2) Upload and reveal the metadata of NFTs
After finishing 1) Launch your NFT collection sales, successfully, you need to upload metadata for your NFTs. That is name, image, description, attributes and traits of each NFT token.
There are 2 approaches when it comes to storage solutions for NFT metadata:
- Centralized, on your own servers: This means collectors have to put trust in you, that you never shutdown the server or change the files after the reveal.
- Decentralized (recommended), on distributed systems like IPFS or Arweave: This gives your collectors peace of mind that you'll never remove or change the metadata after reveal.
The most scalable and reliable way to upload 8000 files with Gigabytes of size is to use ipfs binary directly. This will make sure even if mid-way through your upload there are internet connection issues, the upload continues smoothly afterwards.
What to expect after this tutorial?
- To upload all metadata and media for your NFT tokens on IPFS as a pinned directory.
- To reveal the NFTs after your successful sale.
- Use a pinning service such as Pinata to ensure the metadata lives on the internet forver.
Requirements
Step 0. Generate NFTs metadata and assets
Before uploading your NFT assets you need to generate at least 2 files for each NFT, one is the media (image, or video) and second is the metadata (name, description, attributes, traits).
There are various tools to help generate NFT assets including:
tip
Some of the tools above might also provide IPFS uploading, which would be enough for small collections.
In that case, you can skip to step 3.
Put generated NFT assets to their Token ID, in a directory like:
my-images//0.png/1.png/2.png- ...
/7999.png
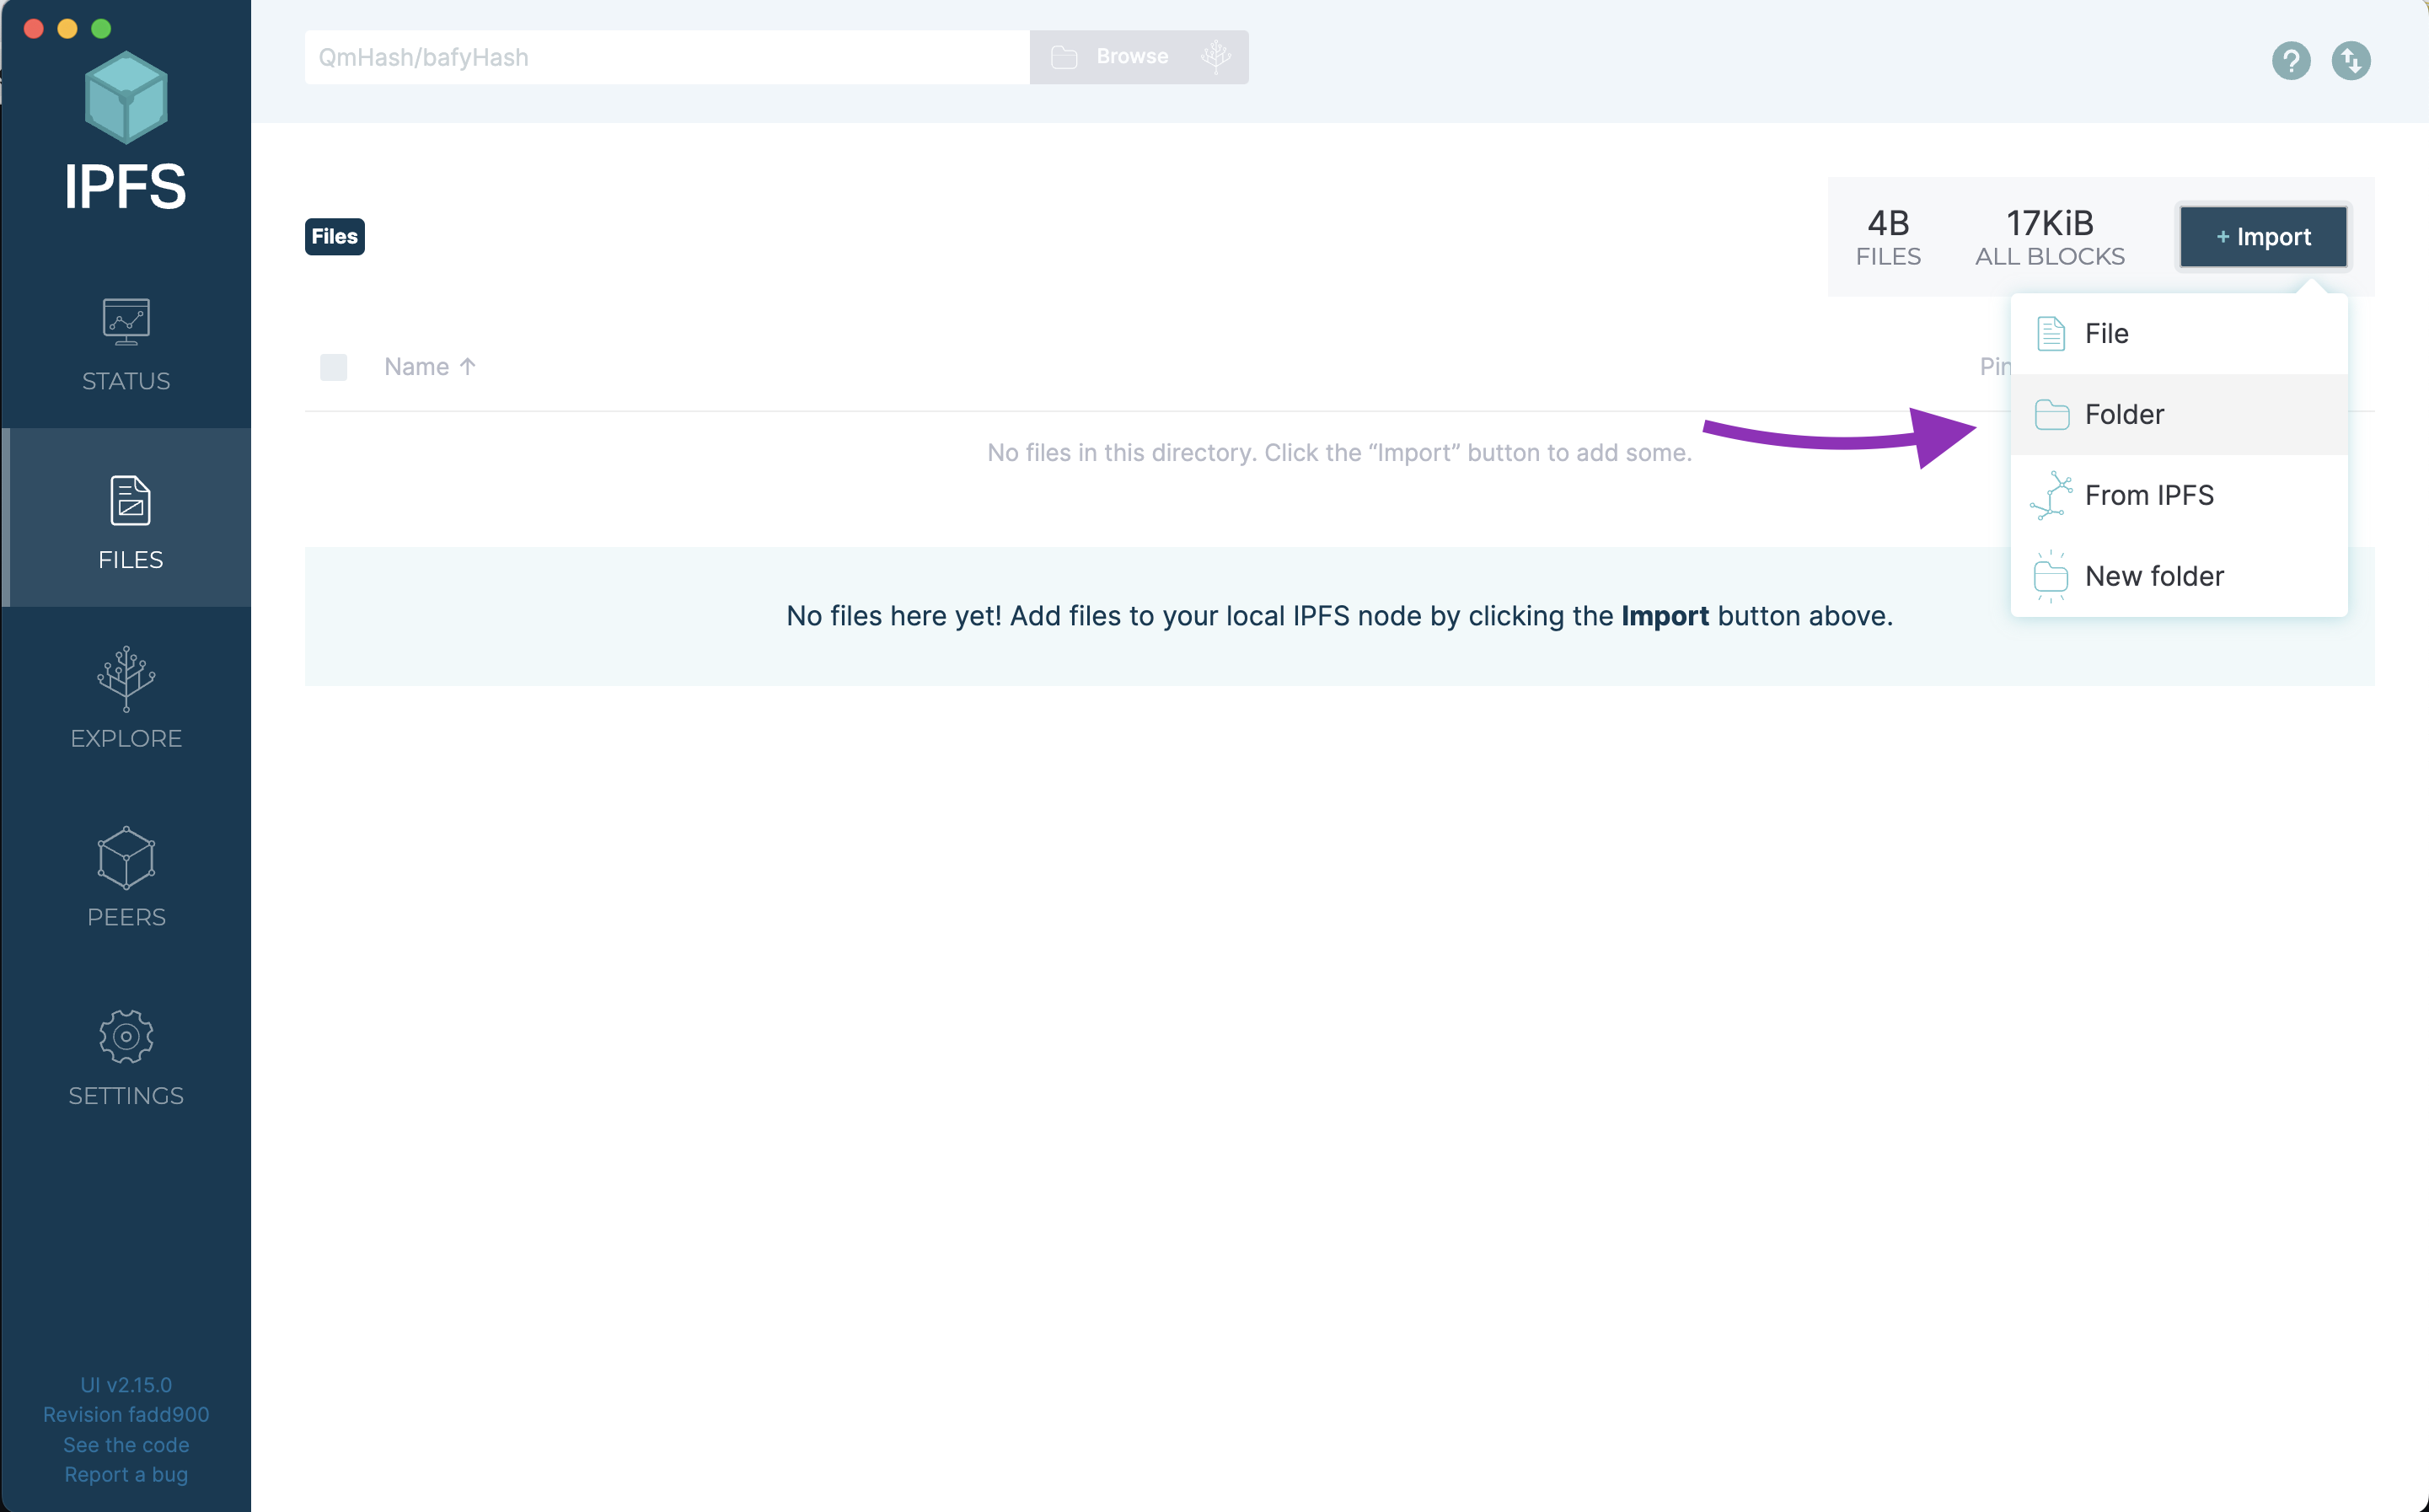
Step 1. Install IPFS Desktop (or cli)
Install IPFS if not installed as described in official IPFS installation guide.
Step 2. Import the media directory
To be ready to prepare the metadata files, first import my-images directory into your local IPFS node. This will result in a IPFS CID which we will use to reference images in the metadata JSON files.
info
This will initiate uploading of your files on IPFS network, which will take a while depending on the total size.
Step 3. Update the metadata files
After media directory is uploaded you need to update each metadata JSON file's image field to use the correct IPFS CID prefix.
- Metadata files must be in a separate directory than images, each metadata file name must equal to token ID, WITHOUT file extension (no .json):
my-metadata//0.json/1.json- ...
/7999.json
- The metadata JSON files must follow the standard decribed by OpenSea, see an example metadata here.
- The websites listed above on Step 0 might allow your to set the images prefix (e.g. "Image Storage URI"), if not you have to use a script to add the
imageto all the metadata files.
For example if the resulting CID for the images is Qmd5g6mUPa8YtX9Ko5KUpdHA8dqtTfqWyqB9HxGRxoxvTv, then the metadata JSON file for token ID 4444 should look like this:
{
  "name": "Angel #4444",
  // ... traits and attributes ...
  "image": "ipfs://Qmd5g6mUPa8YtX9Ko5KUpdHA8dqtTfqWyqB9HxGRxoxvTv/4444.png"
}
Step 4. Import the metadata directory
Same as media directory, you need to import my-metadata directory into your local IPFS node.
Step 5. Keep your IPFS running
To fully upload all your NFT metadata and images, you must keep the IPFS app running. You can turn off your comupter if necessary, but remember to turn it back on, because until all files are uploaded you won't be able to reveal your NFTs.
tip
While waiting for the upload to finish you can proceed to the next step.
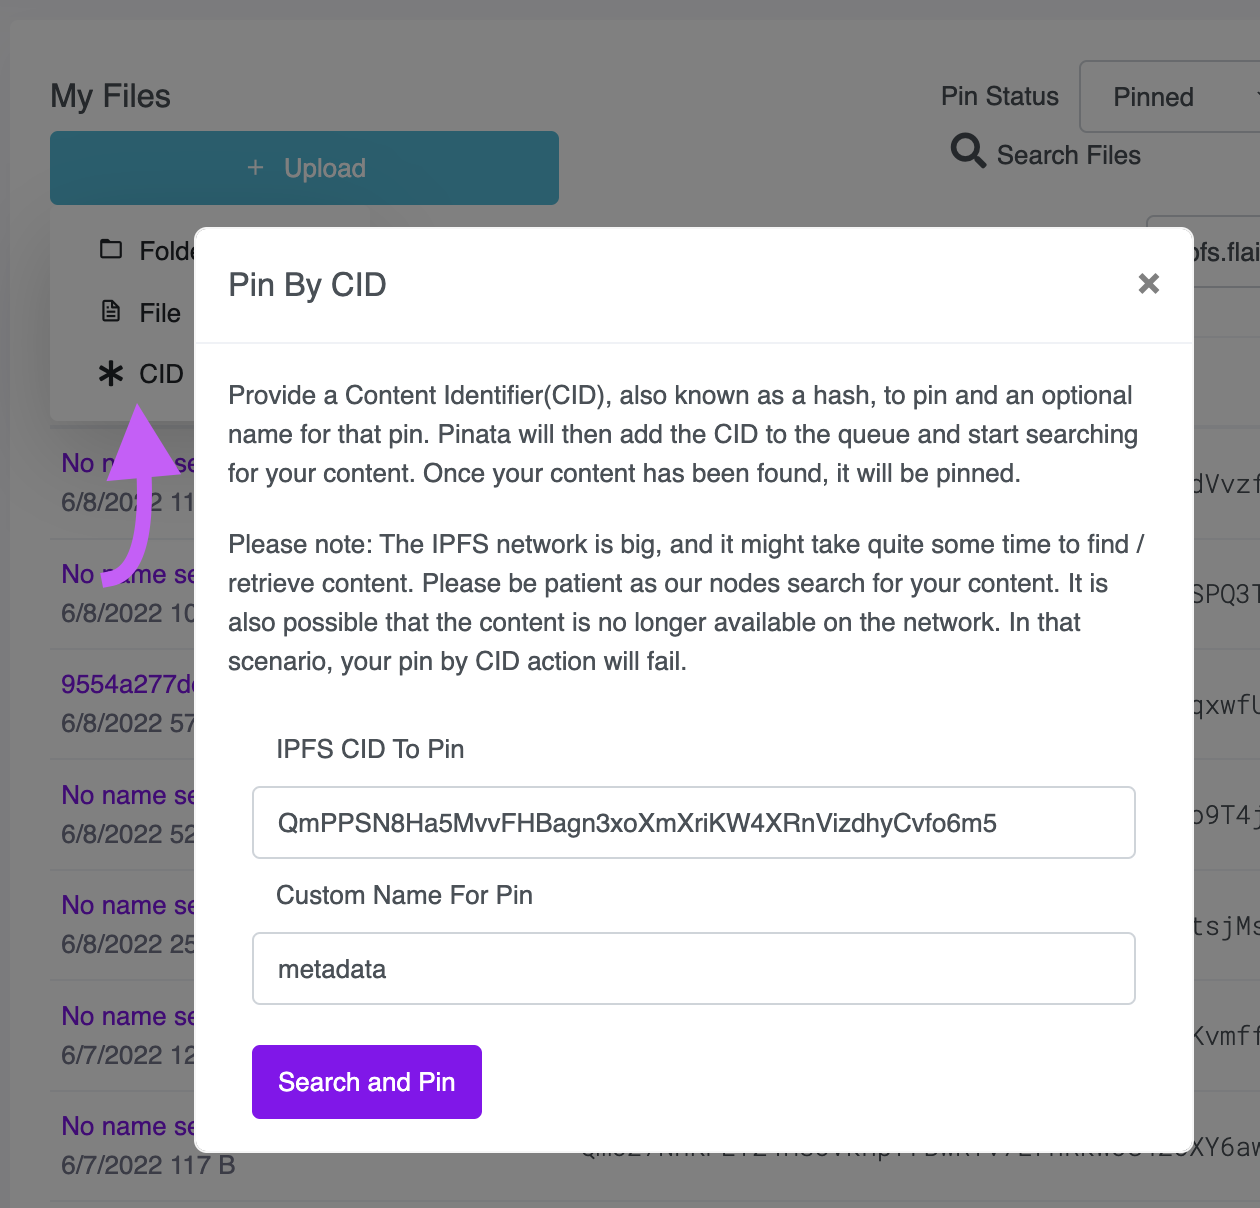
Step 6. Pin the CIDs on a pinning service
Now you need to "pin" your files using a pinning service (such as Pinata), so that they're always available on the internet.
Copy the CIDs from your IPFS client, a string that starts with
Qm...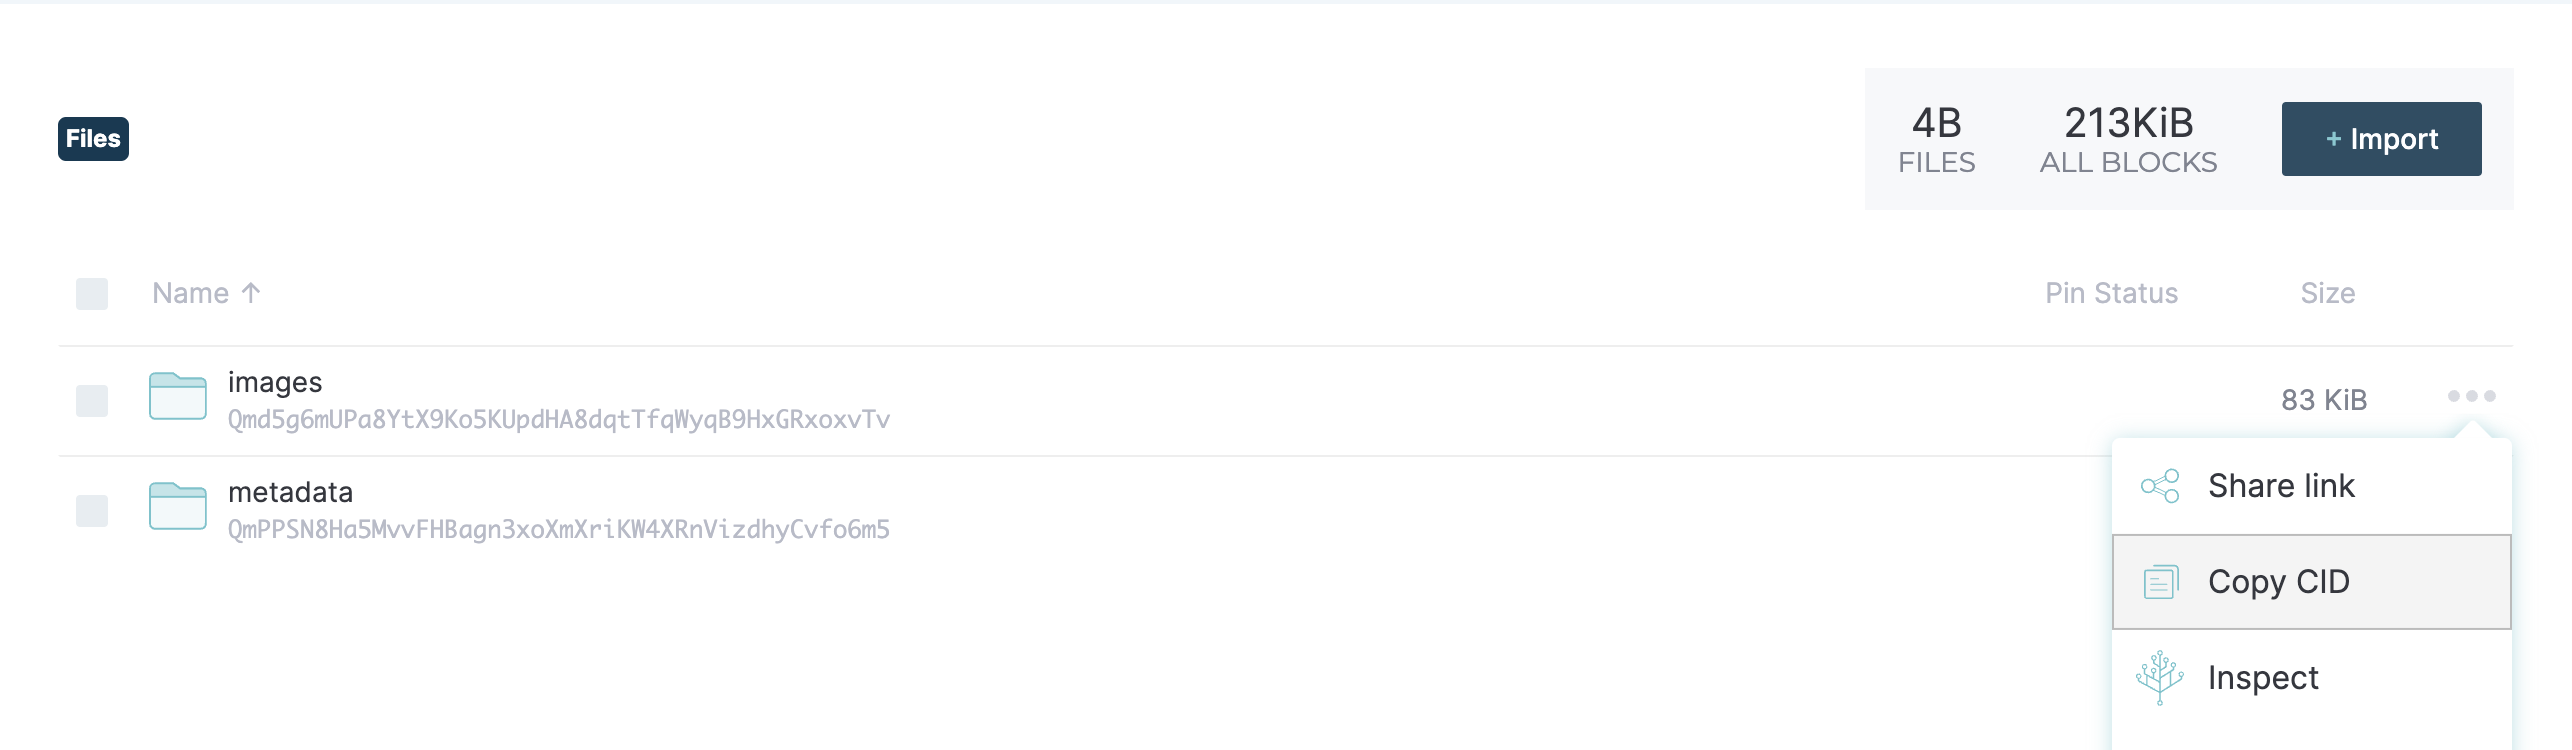
Pin the CIDs in your pinning service, e.g. Pinata.
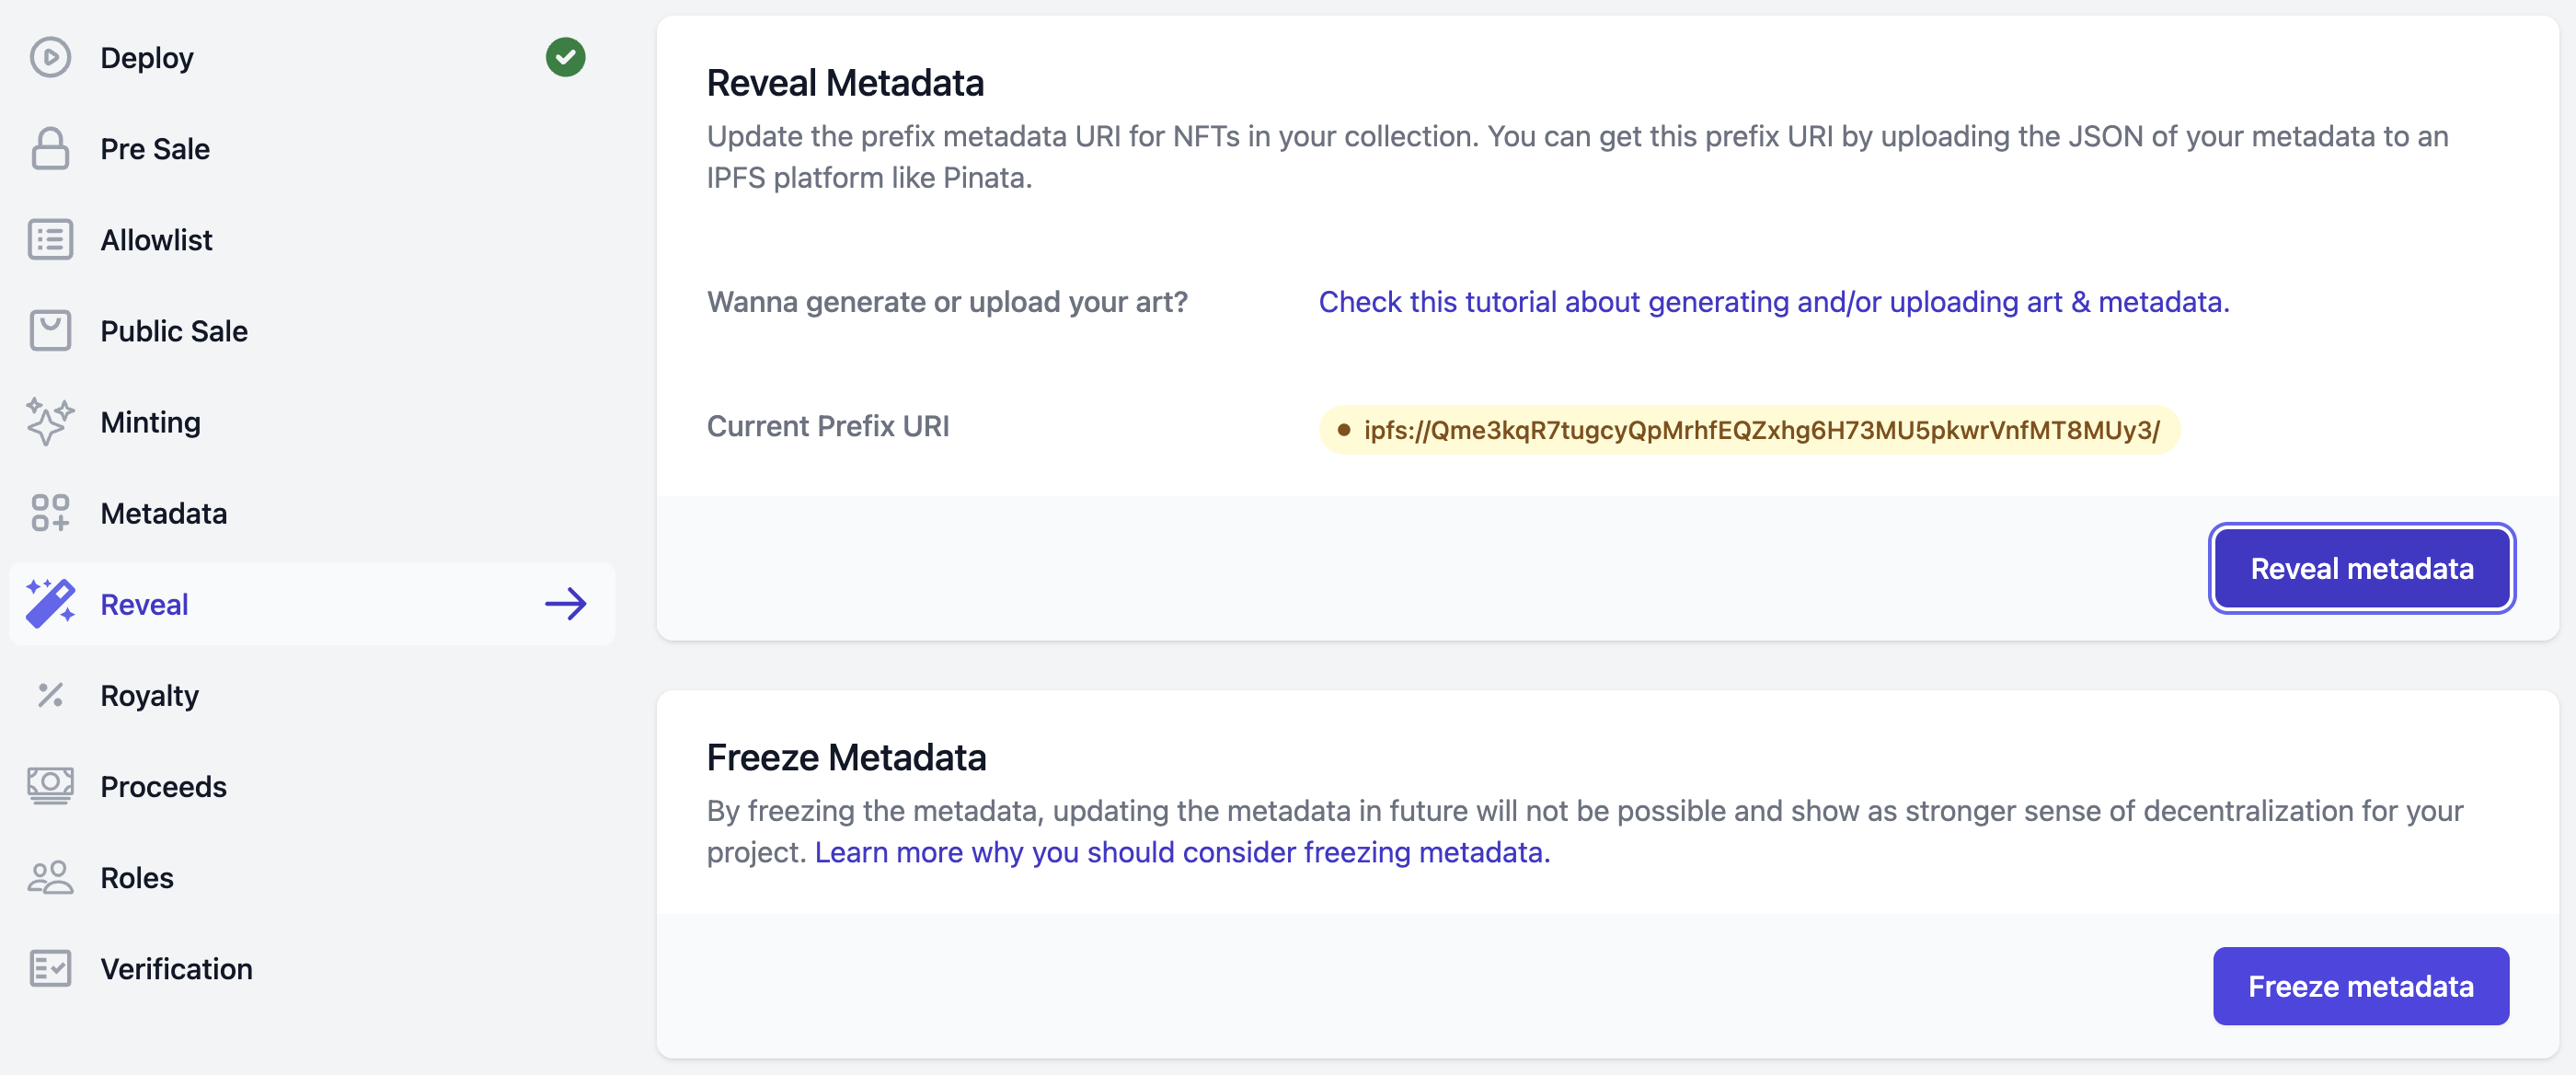
Step 7. Reveal your NFTs
After all files are fully uploaded and pinned, the last step is to reveal by updating the smart contract.
Using Flair's dashboard is the easiest way to do this:
- Open your collection in your dashboard.
- Click on the "Reveal" section, and click on "Reveal metadata"
- Paste the IPFS URL of your "metadata" directory e.g.
ipfs://Qm.../. Remember to prefix the CID withipfs://and end with a/.
Having issues?
Make sure the metadata file format and content is correct. Use the below checklist as guideline:
info
- Format of the JSON files (e.g. no unicode characters, no missing quotes, etc)
- File names start from 0, then 1,2,3,...9999 for a 10k collection for example
- File names for metadata are like 0.json, 1.json, 2.json and for images like 0.png, 1.png, 2.png (lower case extensions .json and .png)Metadata JSON files have the "image" field exactly in this format "image": "ipfs://xxxxxxxx/22.png" for token 22
- When revealing on the dashboard to exactly use this format ipfs://mmmmmmmm/ where mmmm is the IPFS CID of metadata json folder